One of the first steps to fully exploit the potential of the RG350 is to connect it to your computer. This is different from comparable devices with internal mass storage. The device is not recognized as a removable storage device via a USB connection, but establishes an FTP connection with a network device. This article shows you how to successfully connect your RG350 to your computer in a simple and easy-to-understand way.
Einer der ersten Schritte um das volle potenzial des RG350 nutzen zu können, ist das Gerät an den Computer anzuschließen. Hierzu verhält es sich anders als bei vergleichbaren Geräten mit internen Massenspeicher. Das Gerät wird nicht über eine USB-Verbindung als Wechseldatenträger erkannt, sondern baut einer FTP-Verbindung mit einem Netzwerkgerät auf. Dieser Artikel zeigt dir auf einfache und verständliche Weise, wie du deinen RG350 erfolgreich mit deinem Computer verbindest.
Table of Contents
Get the Resources
Network Driver
To access the RG350 under Windows 10, a network driver must be installed. You can get the driver here:
SFTP/FTP Client
On your Computer, you may also want to download your favorite SFTP/FTP client if you haven’t already. We generally recommend:
Install the Resources
Network Driver
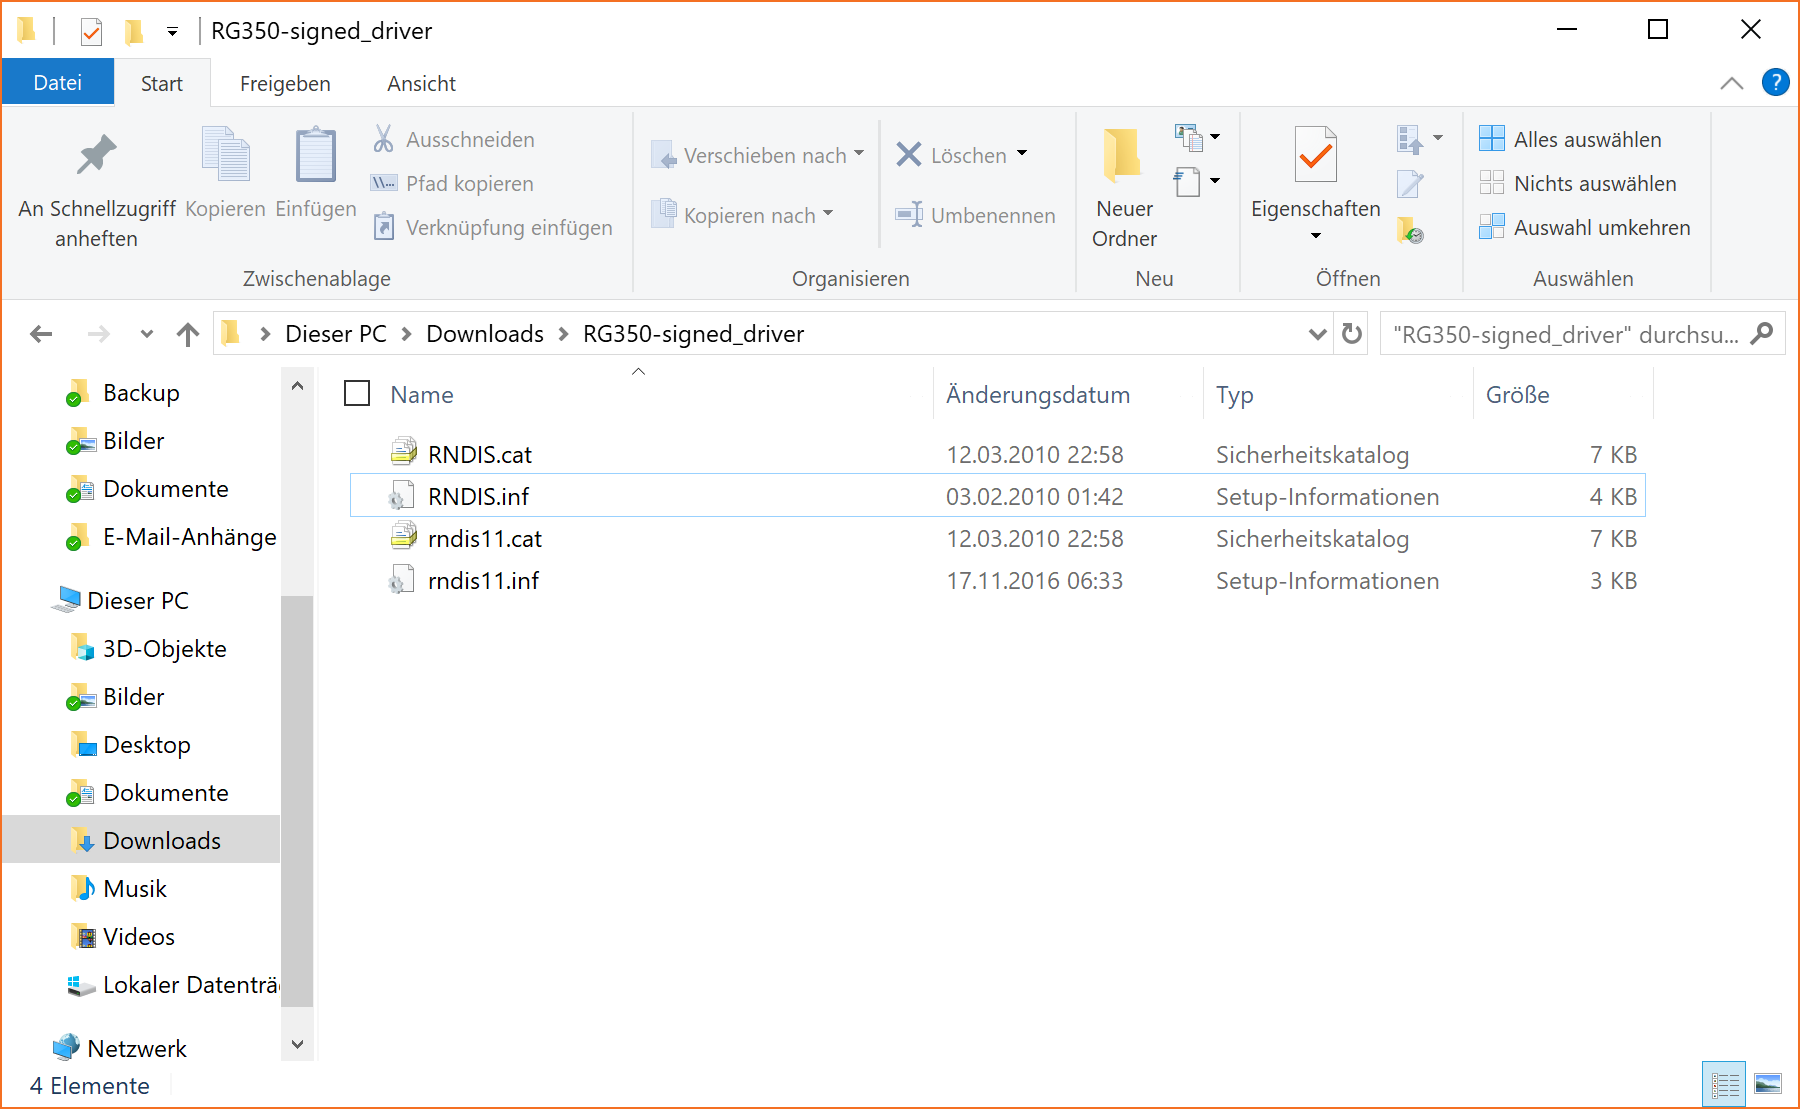
Extract the previously downloaded archive into a folder of your choice and open it.

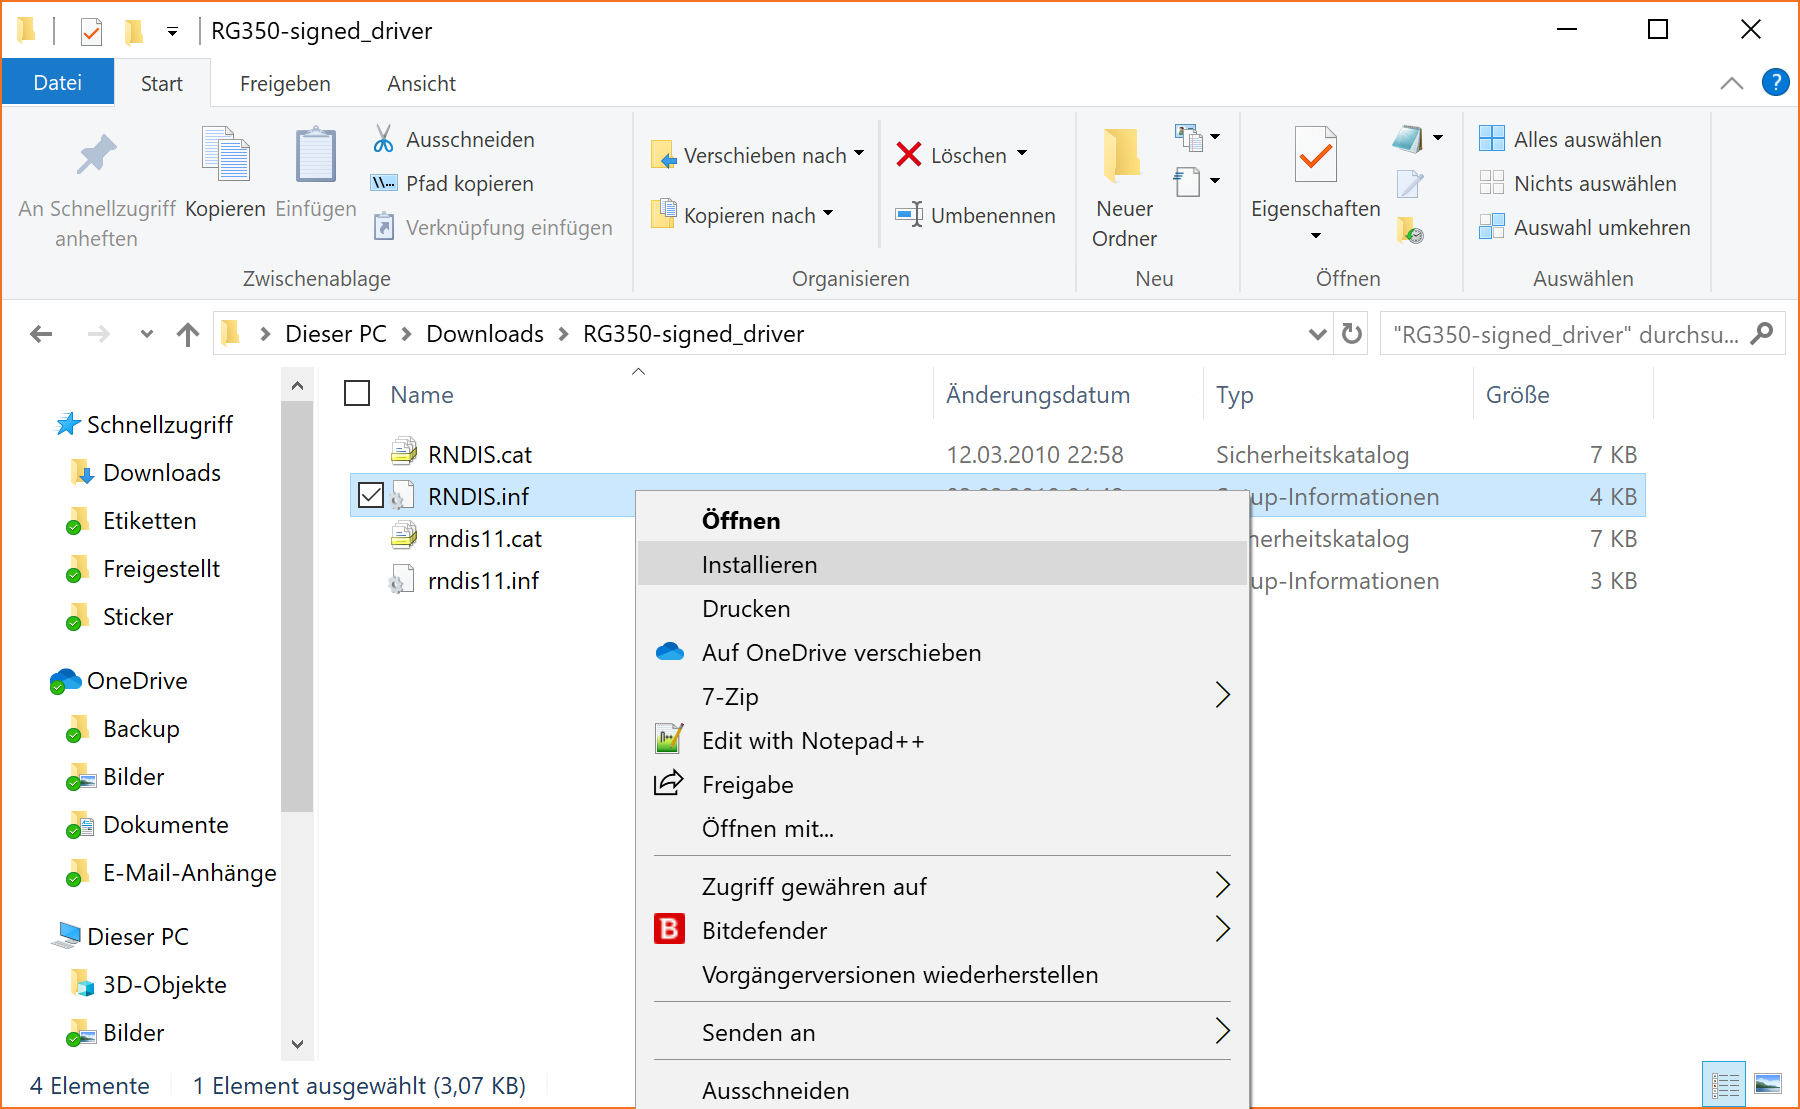
Right-click on the RNDIS.inf file and select Install.

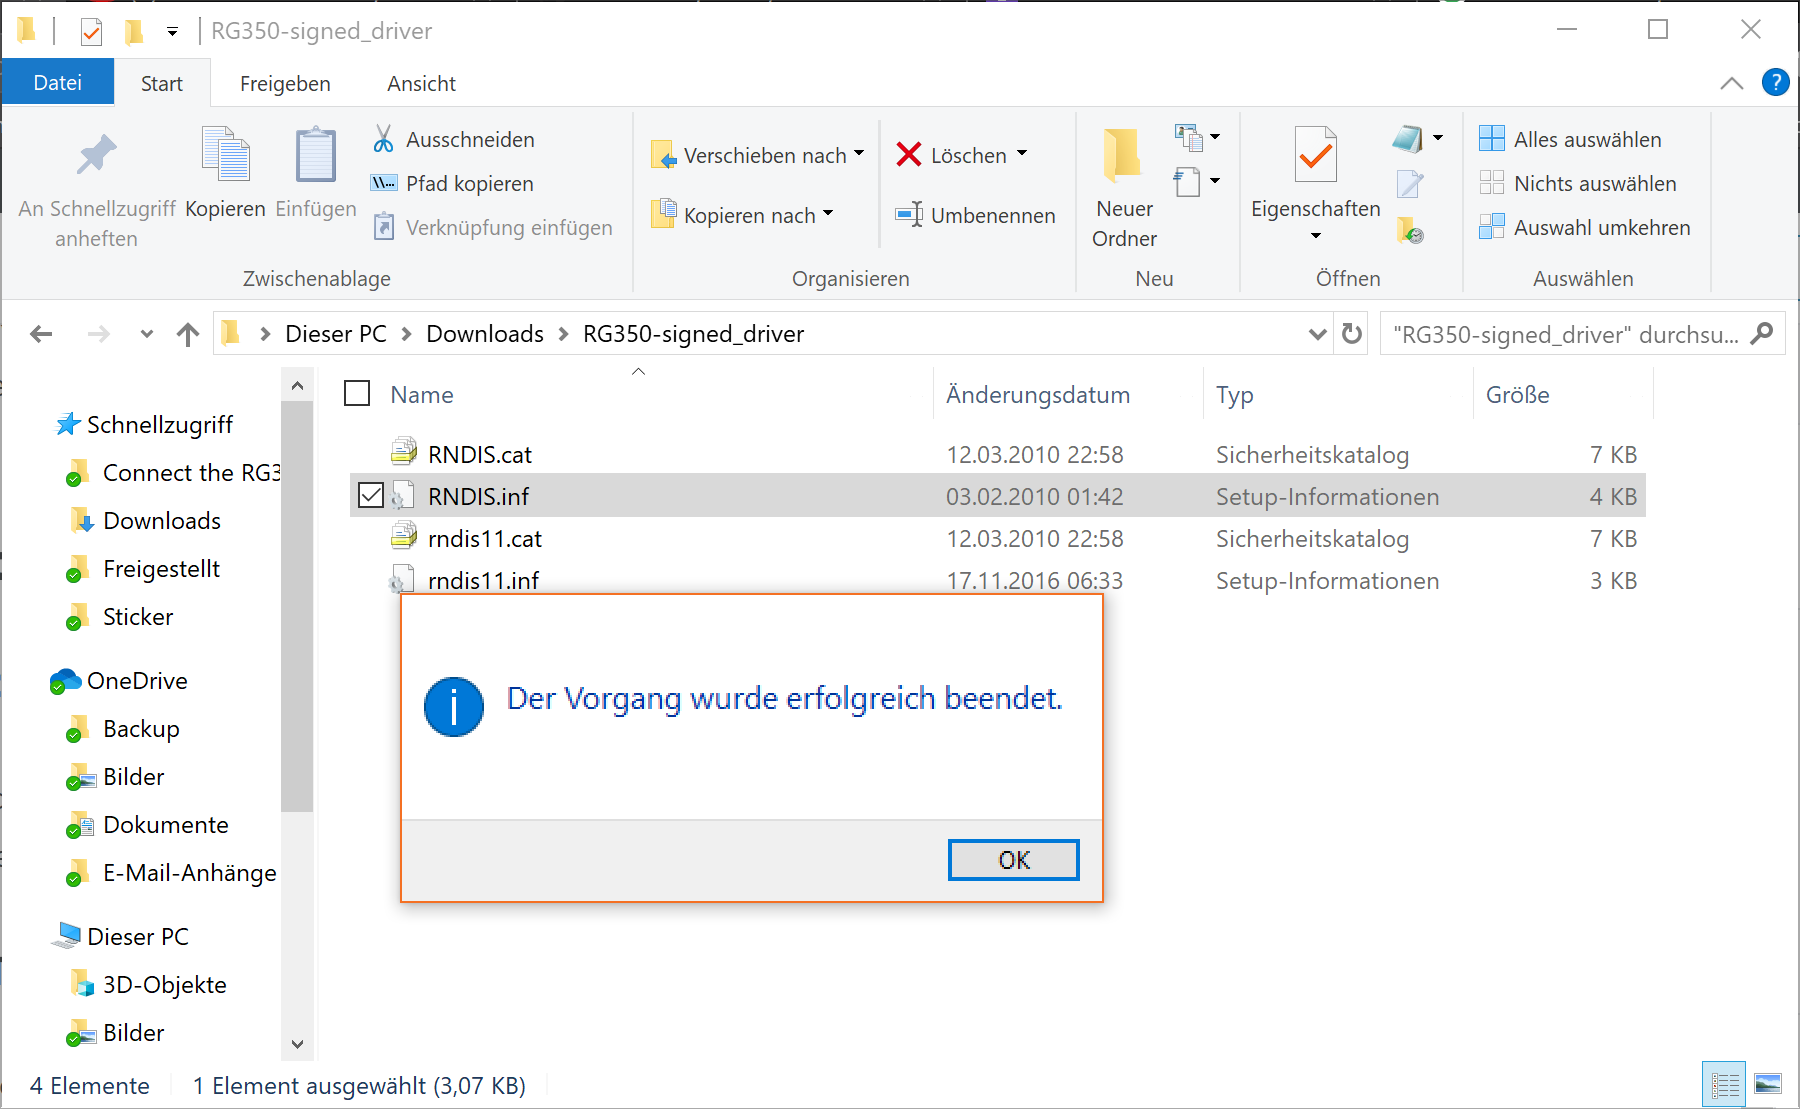
Done! You have successfully installed the driver.

SFTP/FTP Client
No special steps necessary. Install the program normally if you don’t have a client yet.
Connect your RG350
Connect the RG350 to a free USB port on your computer using the supplied USB-C cable.
Use the USB2 marked port on the RG350!
Switch on the RG350 and go to the settings tab. Then open the network app and see if IP addrs: contains usb0: 10.1.1.2.
It may happen that there is no IP address there. Just wait or restart the APP.
Open the SFTP/FTP client of your choice and start a new SFTP connection to the IP address 10.1.1.2 and the user root. Leave the password field empty.
That’s it! You are connected to the RG350 and can navigate through the files of the RG350.
Verbinde den RG350 über das mitgelieferte USB-C Kabel mit einem freien USB-Port deines Computers.
Benutze den mit USB2 gekennzeichneten Port am RG350!
Schalte den RG350 ein und gehe auf den Reiter settings. Danach öffnest du die Netzwerk-App und schaust, ob unter IP addrs: der Eintrag usb0: 10.1.1.2 steht.
Es kann vorkommen, dass dort keine IP-Adresse steht. Einfach etwas warten oder starte die APP neu.
Öffne dein SFTP/FTP-Clienten deiner Wahl und starte eine neue SFTP Verbindung zu der IP-Adresse 10.1.1.2 und dem User root. Das Passwortfeld lässt du leer.
Das wars! Du bist mit dem RG350 verbunden und kannst dich durch die Dateien des RG350 navigieren.
Further information
If you are connected via SFTP/FTP many directories are write-protected. This is intentional and part of the relatively safe handling of OpenDingux user customizations.
Some directories that are interesting for the user and are used more often are given in the following table:
Ist man über SFTP/FTP verbunden sind viele Verzeichnisse schreibgeschützt. Das ist gewollt und Bestandteil des relativ sicheren Umgang mit Nutzeranpassungen von OpenDingux.
Einige Verzeichnisse, die für den Nutzer interessant sind und häufiger genutzt werden, liefert die folgende Tabelle:
| Path | Use |
|---|---|
| /var/log | This contains the “messages” file, which is a system log comparable to Windows Event Viewer. Handy for debugging and troubleshooting. |
| /proc | This contains a list of running processes, and if you’re interested, a text file called “cpuinfo” which contains just what it says it does. |
| /media | This will contain three very important subdirectories, and is the only tree you will typically be able to write to. |
| /media/SDCARD | In the 1.5 firmware, this will be named whatever your SD card is named (rather than “SDCARD”), while in 1.7.5 or later this will always be /media/sdcard. This will be where all of the files in your external SD card are located. |
| /media/home | This is actually a shortcut to /media/data/local/home, but that’s fine. This is where all of your configuration directories are stored for each emulator, as well as saves. |
| /media/data/apps | This is similar to an “Add/Remove Programs” area. To install OPK files, you put them here. To remove them, you take them out of here and put them somewhere else (I generally set aside a directory on my SD card for uninstalled OPKs). |